Showing posts with label crafting. Show all posts

Saturday, October 20, 2012

T-Shirts and Small Projects

I love Saturdays because we can spend the whole day together as a family and I get Tom's help with the babies. I can even run a few errands on my own and leave the babies home with him for a little bit. I knew today was the release of some new Thunder shirts at Tree & Leaf, so I ran to pick some up for me and my crew. I can't get over how cute my sugars are in their little Rumble T's!


And here's my new Thunder shirt!


I've been brainstorming ideas for a small project: organizing Wren's hair accessories. After I picked up our Thunder-wear, I stopped at Hobby Lobby to get a few items for my little project. 

I purchased this precious wrought iron 5-prong wall hook for $8.99 (40% off of $14.99 with a coupon). I also bought 2 white command hooks for $4.99, and a 4-pack of D-rings in the fabric section for $1.99 for the other part of the project. The total for this project was $15.99.

When I got home, I hung the hook on the back of the nursery door because there wasn't an open spot for it on any of the nursery walls. 


Next, I sifted through my big bag of various ribbon pieces. (Okay, it's actually my mom's bag that I confiscated a while back.) After I found 4 pieces of ribbon that were long enough, I trimmed them, heat sealed the ends, and hot-glued them around the D-rings.


After I finished gluing the ribbon on the rings, I hung the rings on the prongs and clipped Wren's bows onto the ribbons. I left the middle prong open for headbands. Pretty simple, and I think it turned out pretty cute!


Since I had all my crafting supplies and ribbon out and I was in a project mood, I decided that Wren needed a bow to go with her Thunder shirt, a brown bow, and a white bow. I think I got a little carried away with the white bow. She'll just have to grow into it! Ha! ;)


Wednesday, November 16, 2011

Little Birds

I was recently asked to be an "artist in residence" who would make and donate 12 homemade Christmas ornaments to an event held at my church called "The Gift Goes On."  The event was a shopping bazaar with the theme of "purchasing with a purpose". There was a silent auction, vendor booths, live music, and sweet treats.  Proceeds from every item sold went to medical and clean water treatment for villages in Cambodia and Christmas presents for needy children in Oklahoma City, which will be distributed by The ROC (Reaching Our City).  It turned out to be a great success and we raised around $7,500 for some wonderful causes!

I wanted to share the inspiration for the little bird ornaments that I made.  I began searching for something I didn't think would be done by one of the other artists and I came across this tutorial for handmade clay birds ornaments over at jessicajanehandmade.  If you want the scoop on how to made some birdies of your own, follow the previous link.  I made some that were stamped with words and some that were just glittered.  Warning! They were quite time consuming [for me at least].


Thursday, March 31, 2011

Talents

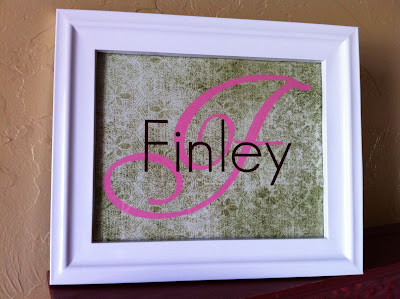
Last weekend I was a hostess for a baby shower for my good friend Julie. She's due to have her baby girl, Finley, in about a month. Finely is who I made the word art for shown here. It was fun to see the talents each hostess brought to the table.
For the shower I made a diaper cake centerpiece using Anthropologie's gift wrap as my inspiration.
My apologies because all of the following pictures are taken with my phone.
I used the word art and diaper cake centerpiece as decoration on the cake and punch table.
My friend Lauren, who was also a hostess, made an incredible and professional looking fondant cake. Can you believe it was only her 2nd time to make and decorate a fondant cake?! I'm so impressed with her cake decorating abilities!
Another friend and hostess, Julie [different Julie than the baby shower honoree], made a cute 'bouquet' of felt flower hair-clips. Aren't they adorable?! I need to have her teach me how to make these. They can either clip straight into hair or on a headband.
I can't wait to see baby Finley sporting those adorable felt flower clips! Julie also made this cute pink and cream houndstooth banner of Finley's name.
I sure have some creative and talented friends! ;)

Trying My Hand

I recently decided to try my hand at "word art" [I guess that's what you call it]. I used picnik to create three pieces of word art to give as gifts. Now that I've given them to their recipients, I can show them on here without spoiling the surprise.
The first piece is a quote containing my word for the year, HOPE. I found out my good friend Vickey shares the same esteem as I do for the theme of HOPE. So along with making this for myself, I had to make one for Vickey as well.
The second piece is some girly subway art for baby Finley, the soon-to-be born daughter of my good friend Julie.
The third piece is Finley's name over her initial.
I wanted to use really cute white ornate frames for my word art, but I couldn't find any in an 8x10 size or any that were reasonably priced. I couldn't even find any true white frames for that matter. So I improvised.
I bought some basic reasonably priced silver frames and I spray painted them with glossy white spray paint.
I can't wait to create more word art on picnik!

Thursday, December 23, 2010

Noel

On this Christmas Eve Eve, I was off work and it was so nice. After a visit to Michael's, I completed two crafts I discovered via the blog world. The first craft was NOEL artwork and the second craft was an ornament tree. The NOEL artwork was inspired by a pricey Pottery Barn piece and was knocked off on the The Steen Style, Frugal with a Flourish, and Thrifty Decor Chick. The ornament tree was also on The Steen Style and Frugal with a Flourish.
Here's the Pottery Barn NOEL:
Here's my NOEL:
The letters are white primed mdf that I spray painted with an oil rubbed bronze spray paint, but it really just looks like I used black spray paint. Not exactly the color I was going for but it looks fine. The background is paintable textured wall covering from Home Depot. I used spray adhesive to attach the wall covering to a cardboard backing. I painted the wall covering background with paints that I already had on hand. The first layer was creme paint I had from my kitchen remodel and the second layer is a glaze made from acrylic burnt umber craft paint that was diluted by a little bit of water. The glaze was painted on and immediately wiped off with a t-shirt. I put the finished back ground in a half priced Michael's frame and then hot glued the letters into place.
I'm really pleased with the outcome of the NOEL artwork. Now the ornament tree is a different story. I have no idea how to glue the ornaments onto the styrofoam cone without numerous gaps with styrofoam showing through. And it took way longer than I would like to admit. Needless to say, I don't love it.
Here's Frugal with a Flourish's ornament tree:
Here's my ornament tree:
It is made using a styrofoam cone, mini ornament balls, and hot glue. I got my ornaments at Dollar General. One package of 15 was $0.50 (they were half off). You can see pictured below that I bought several sizes of cones thinking I would make several ornament trees to group together, but after finishing one, I bagged the rest up and will be returning them to Michael's tomorrow. I don't even want to tackle another one. :/
Since I won't be making any more ornament trees, I have A LOT of mini ornament balls leftover, but I've already found a new purpose for them. Glass vase/jar filler!

Monday, November 29, 2010

A Wild Hair...

...a sudden decision that is not expected. I had a wild hair on Thanksgiving night. We spent the day eating and being with my side of the family, then went over to my in-law's house around 8:00pm. After eating desserts and socializing with family and friends, my MIL and I settled in to peruse the Black Friday ads while our guys watched some football. My MIL came across the Wal-Mart circular which advertised a Cricut Expression machine for about $150 less than you can usually find it. She showed me the ad and we both exclaimed what a deal that price was. (A Cricut is an electronic die cutting machine used for paper and fabric crafting.)
I've been wanting a Cricut machine for the better part of a year, ever since I used my friend Allison's machine to make letters and shapes for the baby blocks shown here. I'm not a Black Friday shopper so I totally dismissed this deal, thinking that I would never capitalize on it. UNTIL, my MIL suggested that I try to get one. Ha, yeah right, you see I'd completely dogged the practice of Black Friday shopping all day long when the topic came up in random conversations. But, the more I thought about it, the more I realized I would probably never find one for that price again. But I didn't want to get up at 5:00am to go to Wal-Mart. (Who wants to get up at 5:00am on their day off, much less go to Wal-Mart at that hour?) My MIL pointed out that some of the Wal-Mart sales began at 12:01am on Friday morning and the Cricut was included in that category. It was already around 10:00pm when I decided I was going to go for it. So, Tom and I watched TV and cat napped in my in-law's living room until about 11:45pm after which we got up and went to Wal-Mart so I could start my hunt.
Tom dropped me off at the front door, I went in and nabbed the merchandise, placed it in my shopping cart, and headed to the front of the store. As I approached the line I immediately thought, "you've gotta be kidding me!" The line was forever long and definitely made me 2nd guess my decision. But I was there and the thrill of finding my deal overtook me. I called Tom, who was waiting in the car and told him to go home and come back later to pick me up. At 2:00am, after I had stood in line for nearly 2 hours, I left with my loot. I am now the proud owner of a pretty aqua colored Cricut Expression and a $2.97 2-quart stainless steel Rival crock-pot. I saw the small crock-pot while standing in line, which is what they want to happen. Yeah, I know, I'm a sucker. It was such a good price and I've been wanting a small crock-pot for when I make party food like BBQ little smokies, etc. And it was under $3.00. That's less than a drink at Starbucks!
Hooray for Black Friday success!

Wednesday, April 7, 2010

Made with Love

Lately I've been crafting up a storm. The catalyst for my crafting spree is the baby boom going on around me. Between co-workers, church/small group friends, and other good friends, there are a lot of babies being added to the various circles of people in my life.
It started back in January when I threw a baby shower at my office for 4 co-workers. For that shower I made my first diaper cake centerpiece.
Two of the co-workers honored at the shower, Alex and Tyler, are in my department, and I work very closely with them on a daily basis. So, I decided to make them something extra special. For each of their babies I made a set of wooden baby blocks. The blocks display different things on each side. One side of the blocks spells the babies initials (Tyler's baby's blocks have his nickname, Mac, on one side as well as his initials on another side), one side displays "abc," one side displays "123," and the other sides have symbols/shapes.
Baby Mac's blocks:
Baby Abigail's Blocks:
In March, myself and my other small group girls threw a baby shower honoring our friend Jamie and her soon-to-be born baby, Addyson. For that I did another diaper cake centerpiece. I wanted to make something special again, so I made Addyson a hand painted hair bow hanger.
Here's Addyson's diaper cake and hair bow hanger:
A week after Jamie's shower, I attended a shower for a sweet friend, Andrea, who is adopting a baby girl from Ethiopia. She and her husband are actually going to Ethiopia to pick up their sweet Abigail on April 13! For Abigail's gift I decided to make another type of bow holder. This one is made with ribbons on a canvas. I asked Andrea what color her nursery was and she told me red, muted lime green, black, white, and silver - which why I chose this color scheme. I love the way it turned out!
Bows I made for Abigail's bow holder:
Now I am onto another crafting project unrelated to babies. My recent muse stemmed from last Monday night when I was at a girl's night get together with girlfriend's from church. We meet once a month, usually on a Monday night. Sometimes we go out to dinner, once we all got pedicures after dinner, and some months we get together in someone's home. This month we met in a home and got crafty with scriptures to display in our homes. To make mine, I used a cheap dollar store picture frame and scrapbook paper.
The scripture I chose for my first project is a scripture I have been claiming for my life and trying to choose to daily follow its command:
"Be joyful always; pray continually; give thanks in all circumstances for this is God's will for you in Christ Jesus."
1 Thessalonians 5:16-18
I totally plan on making more of these. This is such a great idea to keep scripture in front of you and help keep your mind on things above rather than earthly things (Colossians 3:2). And it's pretty inexpensive too!